Web development with python and flask part 2
- winstonmhango23
- Feb 2, 2021
- 7 min read
Updated: Feb 26, 2021
In this part of the series, we will be taking a look at the render_template() method. We will take steps to import it, create templates and static folders. We will then go ahead and use Tailwind CSS to design our first template and render it to the browser with the render_template method.

If you followed my first python web development with flask part 1, you understand then that we imported the Flask class from the flask module of our flask framework. The Flask class(Read my in-depth tutorial on python OOP and Classes) has quite a number of methods that aid in the development of web app. Among them, we used a few that we described, but not the run() method which is used to actually run the whole of our flask application.
Besides all that the Flask class presents, there are other classes and objects in the flask library that we can and will be importing to create different functionalities in our applications. This tutorial will take you through just a few of them to demonstrate how the flask framework works and probably reveal to you that it is really a task of “web development, one drop at a time”, as its motto goes.
We mentioned in the first post of this series that flask is developed on top of Jinja2 among other things. This package(Jinja2) is a templating engine. What it does is enabling parsing python code in the MHTL.
We know pretty well that web pages are created using HTML. Python is not HTML! And generating HTML with python is not fun at all!! But we need to create functions and bring our data manipulated and organized using Python code into the web pages. That’s exactly where Jinja2 comes in.
Straight to the point, render_template () is the function from the flask module that helps us bridge the two worlds. It has the attributes and methods that allow us to call python code, data values, and methods and link them to an HTML page.
Down here, we will take a practical trip to demonstrate how we can get any python code into the web page using the render_template () function in flask, in this order below :
CONTENT LAYOUT
1. Rearranging our flask_app folder by creating two folders inside it. One folder for our previous tutorial and name it part 1, another for this part, and name it part 2
2. Extending our previous code with render_template(), in the part 2 app.py
3. Creating two extra folders (templates and static) in our part 2 folder
4. Creating an Html page with tailwind CSS
5. Connecting (rendering) the Html page from a view function
6. Adding python code and data structure in our python(app.py)
7. Displaying the python code into the Html page with Jinja2 syntax
8. Conclusion
1. A look at and extending our previous basic flask app code
Quickly create two folders inside the flask_app we created in the first part of this series. Name each as part 1 and part 2 respectively. Cut the app.py file and paste in the folder named part 1. Open your part 2 folder and create a new file and name it app.py. Copy the code from part 1 app.py file and paste in it.
2. Extending our previous code with render_template in the part 2 app.py
Below is a code we created in our first flask app from the last tutorial. What we have added into it is the render_template
from flask import  Flask,render_template
app = Flask(__name__)

@app.route("/")
def index():
    return "Hello world!"

if __name__ == "__main__":
    app.run()
Now we have the render template() method in our app global space, ready to be used in our application. But we are not yet set up for it, just a few steps. We need to create the folders from which the Html and static files will be sourced.
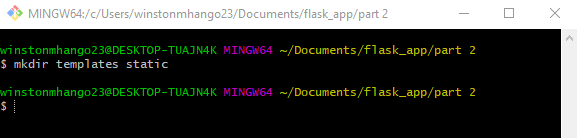
3. Creating two extra folders( templates and static ) in our part 2 folder
Open our bash prompt in the part 2 folder and type the commands in the screenshot below to create our folders
By default, flask set up configuration for the templates and static file locations to templates and static folders respectively. Take a look at just part of how this is set from a snippet below from the flask module.
 def __init__(
 self,
 import_name,
 static_url_path=None,
 static_folder="static",
 static_host=None,
 host_matching=False,
 subdomain_matching=False,
 template_folder="templates",
 instance_path=None,
 instance_relative_config=False,
 root_path=None,
    ):
)
Great, now we don’t need to manually write the settings for the templates and static folder.
That we have folders from where our Html pages and static files(css, images, js …)will come from, it’s time we dive in to create these files and use them in our flask app.
4. Creating our Html page using Tailwind CSS
I really like to look at smart-looking pages. You know it helps present a realistic picture of the real-world application of whatever we are doing. You may use any of the CSS libraries you know to prototype your templates, but I really like tailwind CSS. If you want to know what each of the code lines in the Html snippet below means, check out my tailwind CSS section on how I created and what the code lines and values mean.
Below is what we want to build and have these values, the Table part, be displayed from the python code from the flask application(app.py).
<div id="app" class="container mx-auto  items-center justify-center mb-8">

 <div class="block  text-4xl text-center mt-10">
 <h1 class="text-center text-indigo-900 font-bold">All Students for 2021</h1>
 <h3 class="text-center text-sm text-grey-800">Names of students from all classes(form 1- form 4) for the year 2021</h3>
 </div>

<!--table-->
 <table class=" min-w-full  mt-10  ">
 <thead class="  bg-indigo-700 font-bold shadow-b-lg text-white">
 <th class="py-4 px-6 rounded-tl-lg ">Image</th>
 <th class="py-4 px-6 ">Firt Name</th>
 <th class="py-4 px-6 ">Last Name</th>
 <th class="py-4 px-6 ">Gender</th>
 <th class="py-4 px-6 ">Class/Form</th>
 <th class="py-4 px-6  rounded-tr-lg"></th>
 </thead>
 <tbody class="text-center text-gray-900"style="background-color: rgba(255, 255, 255,0.8);">
 <tr class=" text-center    text-sm   hover:bg-gray-200 ">

 <td class="py-1 px-2 border-t border-gray-400">
 <img class="p-2  bg-grey-lighter border-2 border-gray-300 h-16 w-16  rounded-full"
 src="../static/images/bvalogo.png">
 </td>
 <td class="py-4 px-6">Jenifer </td>
 <td>Kenson</td>
 <td>Female </td>
 <td>Form 2</td>
 <td><a href="client.html" class="py-1 px-6 text-white font-bold bg-indigo-300 rounded-full " style="/*background-color: #ff0066*/;margin-left: -89px;">view</a></td>
</tr>
What we have here is a student’s registration application template that we need to use in our flask application. Above I have both the code and the output of the code as displayed in the browser window.
This code is placed in a templates folder file named students.html. The static files are placed in the static folder (even though the static links have been used to connect to the files). We will take a look at how to dynamically pull the static files from the static folder in the next lesson.
5. Rendering the html pages from the templates folder
Having created our html page with tailwind css and placed in the templates folder of our part 2 folder. Now we need to render the page in the browser with the render_template() method.
from flask import Flask,render_template
app = Flask(__name__)

#creating first app route and view method
@app.route("/")
def index():
 #using render_template to display our html pages from templates folder
 return render_template("students.html")

if __name__ == "__main__":
    app.run()
We are now set to spin our flask server and take a look at what we get at the root of our application(localhost:5000). As usual, while inside our part 2 folder, open the console window. Activate the virtual environment. Then type the flask run command to launch the application in the browser. Below is how you get that done.
C:\Users\winstonmhango23\Documents\flask_app\part2>venv\scripts\activate
(venv) C:\Users\winstonmhango23\Documents\flask_app\part 2>flask run
* Environment: production
 WARNING: This is a development server. Do not use it in a production deployment.
 Use a production WSGI server instead.
 * Debug mode: off
 * Running on http://127.0.0.1:5000/ (Press CTRL+C to quit)
Our application is running. Let’s open our web browser and navigate to loacalhost:5000
We have our students.html template displayed with all the static files in it in our browser. Great, that’s a milestone. Below is what we have in the browser.
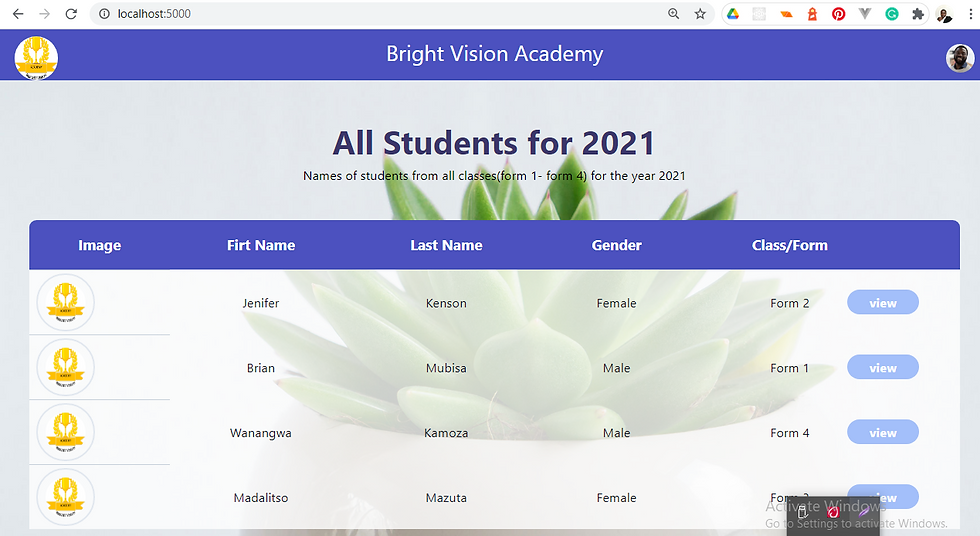
But what we have in this table is all static data. It's hardcoded Html values. What we need is the values coming from and generated by Python code…I guess that’s the whole idea of using flask, to work with python code on the web. Let’s do that part next.
6. Adding Python code and data structure in our Python(app.py) app
Apparently I have a lot of python console projects. I will pick one from the lists projects I have. You know lists are a collection and iterable data structures in python. I will add my list of dictionaries and write them in my flask app.py as below.
from flask import Flask,render_template
app = Flask(__name__)
@app.route("/")
def index():
 # defining a variable students and assigning a list of dictionaries as its value.
    students = [
        {"first Name":"Jenifer" ,"Last Name":"Kenson","Gender":"Female","Class":"Form 2"},
        {"first Name":"Brian" ,"Last Name":"Mubisa","Gender":"Male","Class":"Form 1"},
        {"first Name":"Wanangwa" ,"Last Name":"Kamoza","Gender":"Male","Class":"Form 4"},
        {"first Name":"Madalitso" ,"Last Name":"Mazuta","Gender":"Female","Class":"Form 3"}
    ]
 #using render_template to display our html pages from templates folder
 return render_template("students.html",students = students )
I have a list of dictionaries holding 4 students records. I assign my list to a variable student. Then I pass, together with my html template, the students variable to the render_template() function as an option.
That’s very pythonic!! Here all I want is to use python list methods to display these dictionaries to the user.Let’s get that done in the next step.
7. Displaying the python list of dictionaries in html page with Jinja2.
Jinja2 is a templating engine that gives a flying whistle to the code we write in python in our flask scripts in the browser through html interpolation. If you have used any of the front-end libraries like angular,vue or React,the syntax is just similar. Below is how my HTML code looks in the students.html template.
<tbody class="text-center text-gray-900"style="background-color: rgba(255, 255, 255,0.8);">

                {% for student in students: %}
 <tr class=" text-center    text-sm   hover:bg-gray-200 ">

 <td class="py-1 px-2 border-t border-gray-400">
 <img class="p-2  bg-grey-lighter border-2 border-gray-300 h-16 w-16  rounded-full"src="../static/images/bvalogo.png">
 </td>
 <td class="py-4 px-6">{{ student["first Name"]}} </td>
 <td>{{ student["Last Name"] }}</td>
 <td>{{ student["Gender"] }} </td>
 <td>{{ student["Class"] }}</td>
 <td><a href="client.html" class="py-1 px-6 text-white font-bold bg-indigo-300 rounded-full " style="/*background-color: #ff0066*/;margin-left: -89px;">view</a></td>
 </tr>
                {% endfor %}
 </tbody>
Look at that!! Jinja2 allows us to write Python for loops right in the HTML. The {%...%} syntax allow us to write python code (for loops, conditional blocks, variables…), while the {{….}} Syntax allow us to display(interpolate) values from python code in HTML pages. Please don’t forget that the {%...%} comes and must have a closing pair.
In this template, I have used a for loop over a table row. All the dictionaries are unpacked into columns using table data<td>. This loops over my python list(students) and creates table rows in my Html. We will look at Jinja2 in-depth in our next lessons.
If we go-ahead to run our flask application, we see the results as displayed in the screen-shot below.
8. Conclusion
I hope you now have an idea of how much or what we can achieve with flask. This is just a glimpse. We have just taken a look at how we can push our python code into the web pages. The render_template() function gives us that magical glue power to take our python variables, objects, data structures, and functions straight into the web pages.
We have seen what a team player Jinja2 is into this flask micro-framework is. The render_template() function is just a messenger, the actual actor in the Html templates is Jinja2 with its powers allowing us to write Pythonic code in Html.
Web development, one drop at a time, up next we will take a look at how the pages we are loading from our development server are given to us, the HTTP request and responses together with their methods (GET, POST….).


Comments